VirtualDub is a free video processing software for Windows platforms (sorry no Mac or Linux support). It’s primarily used for tasks such as video compression, adding filters and effects, and transcoding video files. VirtualDub doesn’t have the capability of a typical video editor, instead, it focuses on performing various video processing functions.
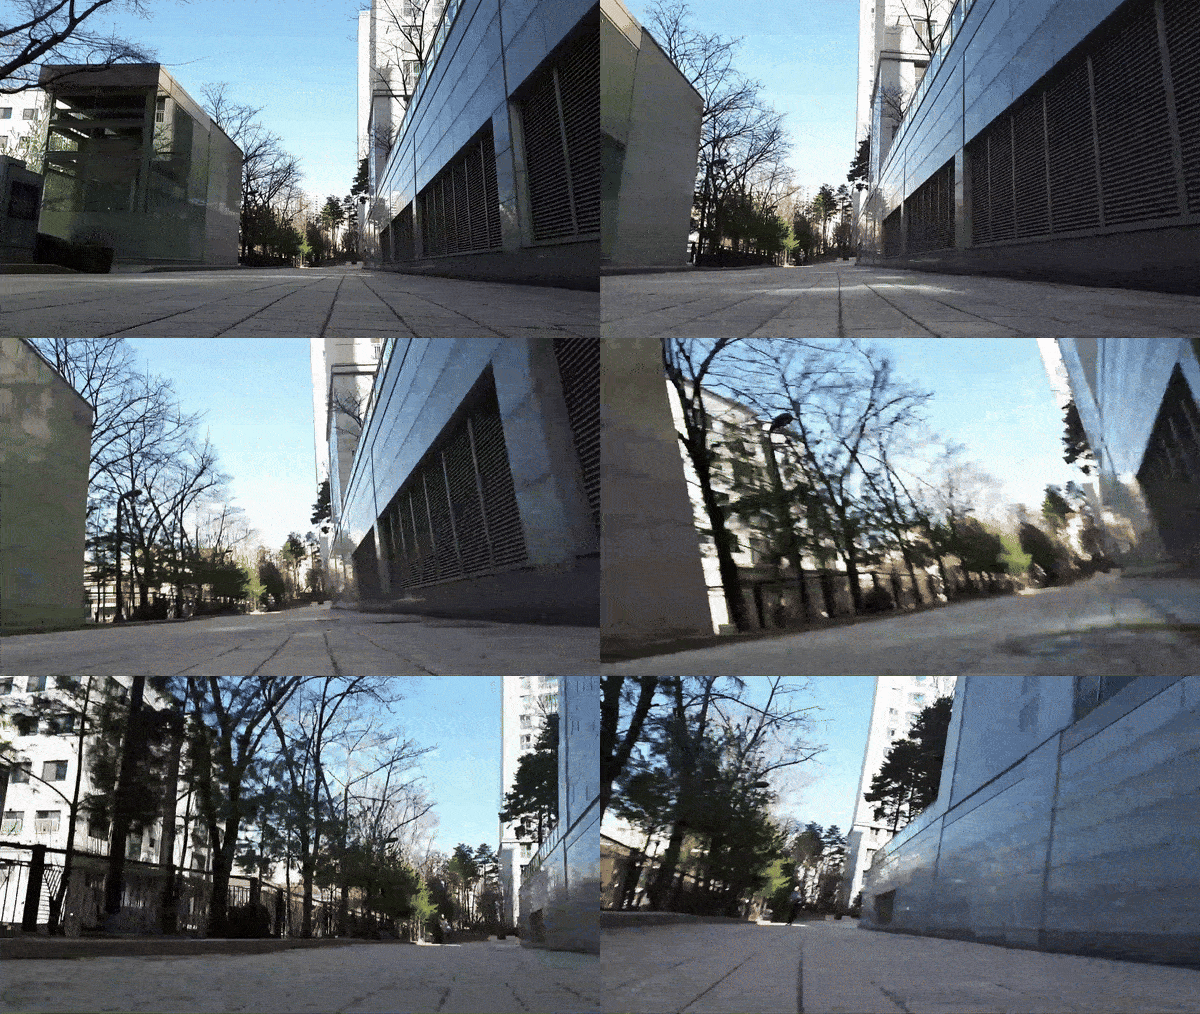
One of its many functions is removing jittery from videos. This guide covers a step-by-step tutorial on how to stabilize videos with the Deshaker plugin. What better way to demonstrate this tutorial than to use a shaky video from an RC car FPV (First Person View) footage.
1. Download and Install VirtualDub
Go to VirtualDub Page at SourceForge.net to download this free software – 32-bit and 64-bit Windows versions are available. In this tutorial, we shall download the 64-bit variant. The download file doesn’t come with an installer so you need to create an independent folder (such as C:\virtualdub) on your PC and unzip the content.
2. Install DeShaker Plugin for VirtualDub
Visit Guthspot.se to download this free plugin. You may unzip the downloaded zip file under your VirtualDub plugins folder but you must place the .vdf file in the VirtualDub plugin directory itself (such as C:\virtualdub\plugins64), not under another subfolder.
3. Convert Your MP4 File to AVI
Regrettably, VirtualDub only supports AVI video format. But all hope is not lost. You can use MP4Cam2AVI Easy Converter free software to convert your MP4 files to AVI.
4. Open Your Jittery Video in VirtualDub and Run Deshaker
Run VirtualDub by clicking on the executable file. In this tutorial, we shall run the Veedub64.exe file. In VirtualDub, go to File -> Open Video File to open your AVI video file.
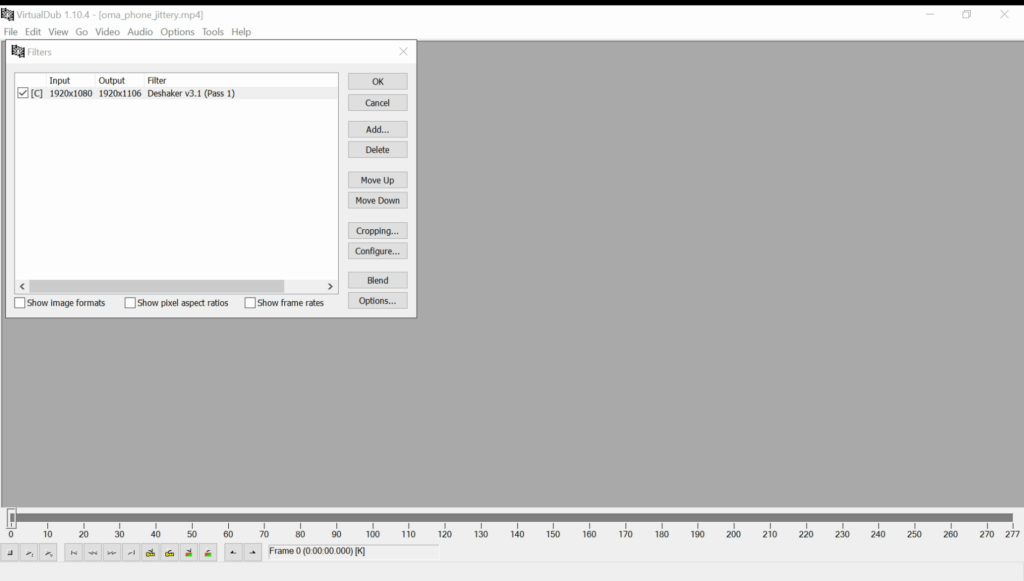
Now, go to the menu Video -> Filters and click on the Add button. Search for Deshaker filter and you will see a box as depicted below.
5. Run Pass 1 on Deshaker
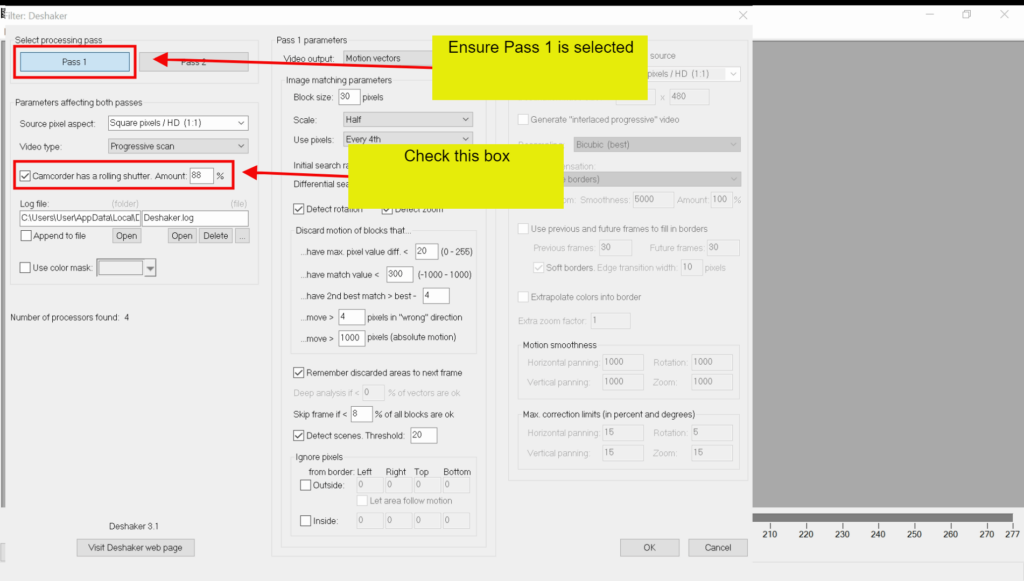
You need to perform two filtering processes in order to remove jittery from your video. Once you have added the Deshaker filter, you should see a user interface as below. Ensure Pass 1 and “Camcorder has a rolling shutter” are selected. Then, hit the OK button.
Next, go to File menu and click on Preview filtered. Let the filtering process run its course. Now is a good time to make a cup of coffee or browse your favorite social media app because this may take a while depending on the length of your video.
5. Run Pass 2 on Deshaker
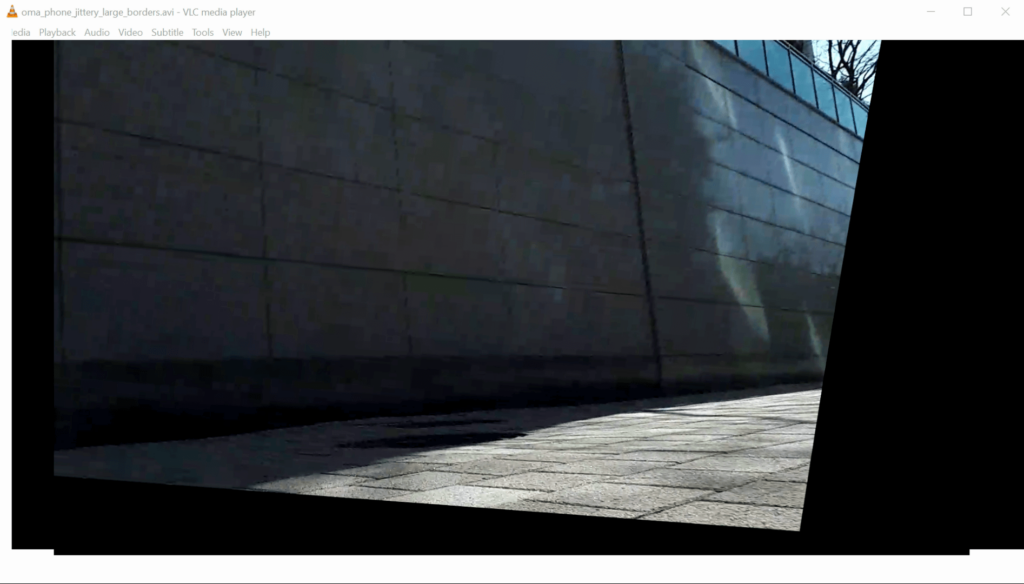
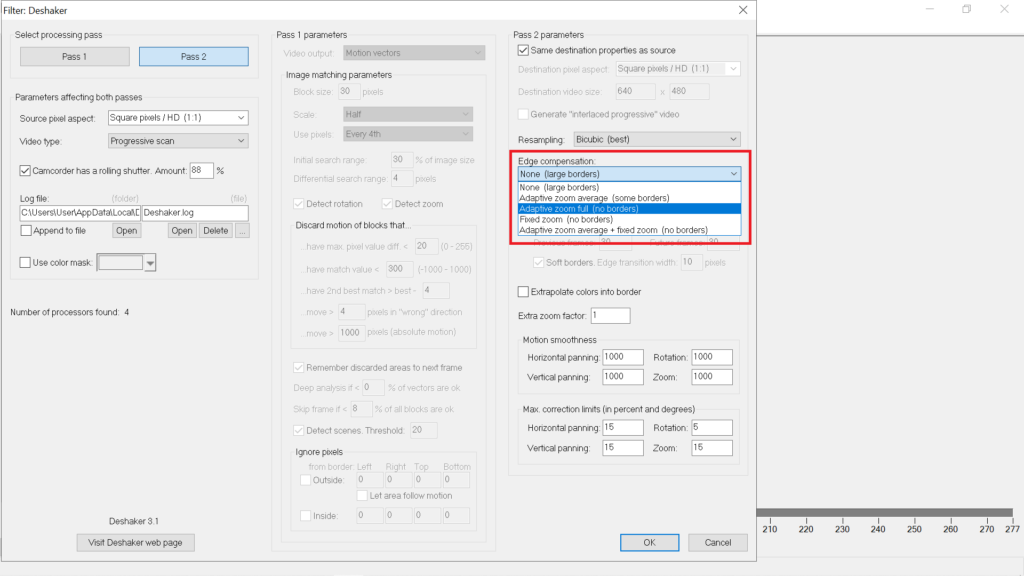
Once the first pass is complete, go back to Video -> Filters and click on Deshaker filter again. This time, select Pass 2. Inside the Pass 2 parameters box, go to Edge Compensation dropdown menu. This is to remove the black borders that may appear in the video. These boxes are side effects of software video stabilization.
Here, you have a list of choices.
- None – Your video would have black borders around it
- Adaptive zoom average – some borders
- Adaptive zoom full – no borders
- Fixed zoom – no borders but reduce the view of your video
- Adaptive zoom average + fixed zoom – no borders
Let’s select Adaptive zoom full (no borders).
6. Video is Saved While Pass 2 Is Running
Go to File and select Save as AVI to save your file. The video file will be saved after Pass 2 process is complete. Again, this will take some time.
Final Result
The video below depicts the final result you would expect. The jitters are not completely removed but have been dramatically reduced. The video compares the different edge compensation settings that were used when stabilizing the shaky video.
Adaptive Zoom Full and Adaptive Zoom Full + Fixed Zoom options seem to offer the best results without minimizing too much of the view. However, this depends on the video itself. Feel free to experiment with different selections.
If you wish to continue experimenting, you may try different selections listed in this other tutorial.

