Camber and toe in and out are a topic that may get us scratching our heads. I know I did. So, in the spirit of trying to settle the score with Mr. Confusion, here’s a comprehensive guide that attempts to cover the all-you-need-to-know about camber and toes and how to specifically align them to suit your RC driving style. Let’s start with concise definitions of camber and toe-in and toe-out.
What is Camber (Positive and Negative)
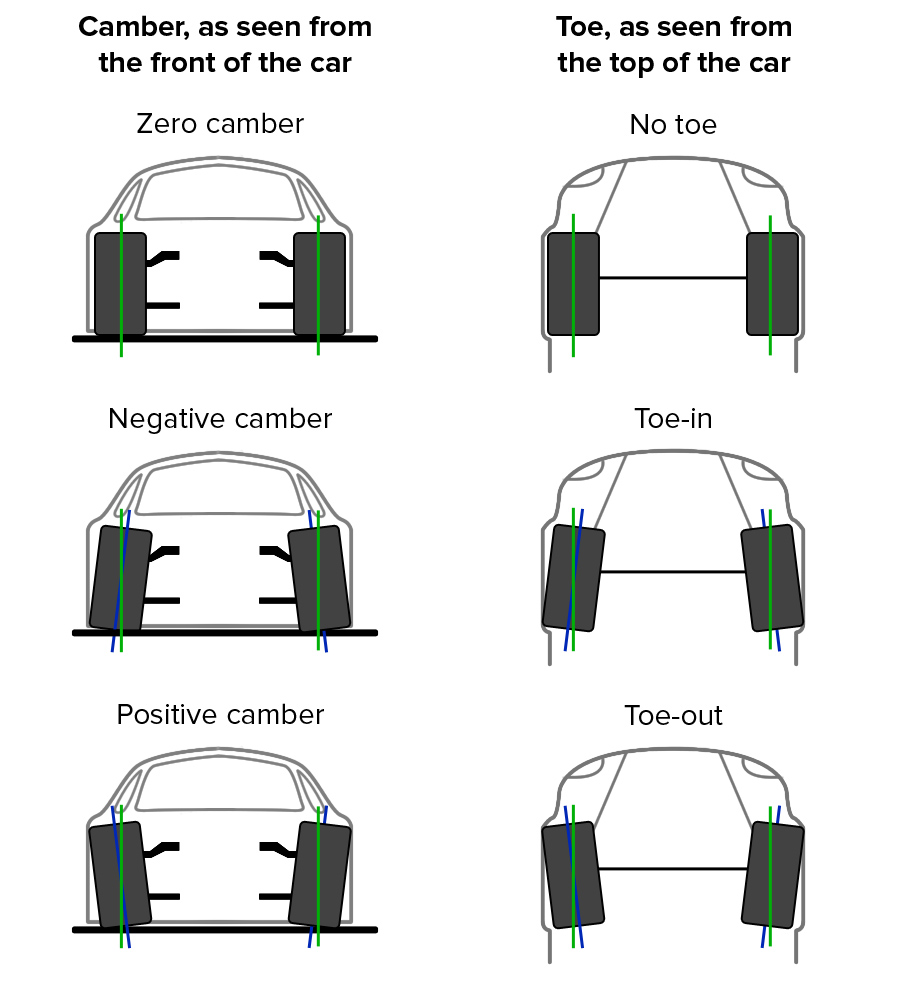
In short, camber is the vertical angle of your wheel – whether it is angled inward towards the body of your car (negative camber) or angled outward (positive camber). What? Since a picture tells a thousand words, please view the image below.
What is Toe-In or Toe-Out
As illustrated in the diagram above, toe-in means the front of your wheels are facing inward toward the body of your RC car while toe-out means facing out.
A simple analogy would be imagining the wheels as your feet. While looking at your feet, rotate your feet so that they are angled inwards. Now, your toes seem to be facing in, thus toe-in. While toe-out is then your feet are angled outward.
Next, let’s understand what we need camber and toes in RC vehicles.
Why Do We Need Camber
We want negative or positive camber to get more grip or stability. In a nutshell, negative camber gives you more grip while the positive side gives you more stability.
Why Negative Camber
When the top of the wheel, especially the front wheel, is tilting inward toward the car chassis in a negative camber, the contact surface between the tire and the ground increases, thanks to the suspension system. This makes the vehicle more stable, especially during high speeds. Since the suspensions of an RC car are usually angled inward, you want to do the same for your RC wheels.
Why Positive Camber
When the top of the wheel is tilting outward in a positive camber, your vehicle becomes more stable if the ground is not smooth. This is particularly true when you’re driving off-road. Imagine the top of the wheels are arms extending out from your car while it maneuvers through uneven surfaces. It helps to stabilize the car. This would be beneficial for RC crawlers.
Why Do We Need Toe-In or Toe-Out
We need them to help in stability and cornering. However, having the toes in or out has countering benefits.
Why Toe-In
You want toe-in to improve stability when driving straight. It also helps to reduce tire wear. However, excessive toe-in can reduce steering responsiveness in RC vehicles because it makes the wheels more stable and hence more difficult to turn.
Why Toe-Out
Toe-out helps you to corner more aggressively because it makes the car feel more responsive to steering input due to the instability it creates. Therefore, it makes the car less stable in straight lines and increases tire wear. Essentially, it has the opposite effect of toe-in.
How to Adjust Camber in RC Car
Now that we have the idea about the what and why of camber, how do we align our wheels to achieve this? There’re really sufficient online videos about how to adjust the camber for RC cars but I’ve yet to find one that offers enough detail on how to specifically adjust the turnbuckles or tie rods. Another what?
What Is a Tie Rod or Turnbuckle
Tie rods or turnbuckles are the metal extendable rods that connect your wheels to the body of your RC car. Tie rod and turnbuckle are practically the same and used interchangeably in the RC world. They are sometimes called steering link rods. You adjust these rods to achieve positive or negative camber.
In the RC market, there are generally two types of tie rods – one with a hole in the middle and one with nuts. In this guide, we shall use the one with a hole, as shown below.
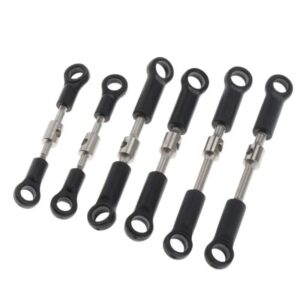
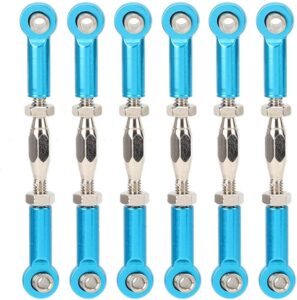
There are usually two tie rods on each wheel – one to adjust the camber and the other for toe-in or out. The one connecting to the top of the wheel is naturally for adjusting camber while the one lower and near the back of the wheel is for toeing.
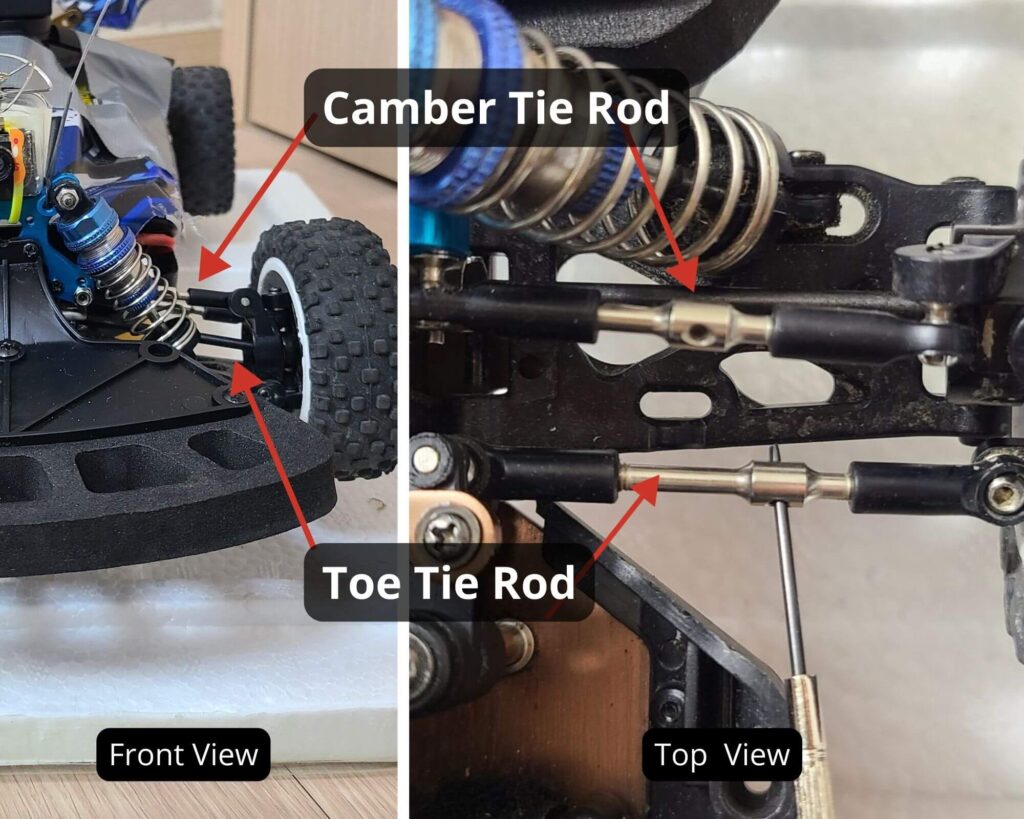
To achieve a negative camber, you need to reduce the length of the tie rod. You do this by placing a small Allen key or screwdriver into the adjusting hole and rotating it. Allen key or hex key is most recommended since their “L” shape helps to squeeze into the tight area around your wheel. The confusing part is how to rotate – clockwise or anticlockwise.
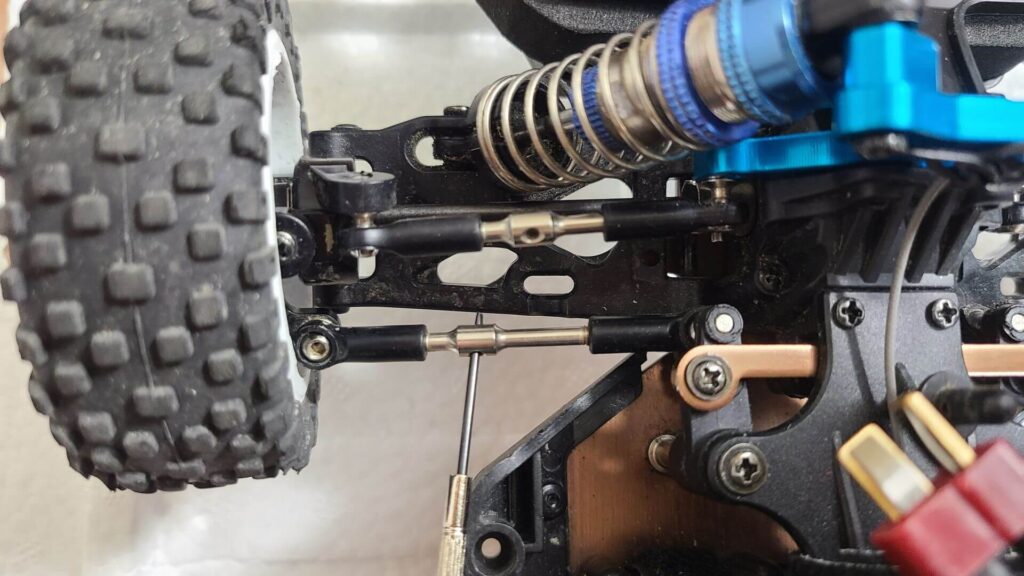
Use the screw thread on the rod as your guide. For example, the turnbuckle in the image above depicts some exposed thread on the right end of the rod. A clockwise rotation resulted in less exposure of the thread, hence, the rod was shortened. A shorter rod means a more negative camber, and vice versa since the rod will pull the top of the wheel further inward.
A small adjustment goes a long way so be conservative when aligning your camber or toe.
How to Adjust For Toe-In or Toe-Out in RC Car
The method to adjust for toeing is the same as aligning for camber. You only need to adjust the other lower turnbuckle. To create a toe-in effect, you need to extend the tie rod so that it will push the front of the wheel nearer to the chassis. Toe-out has the direct opposite adjustment.
How to Adjust Camber and Toeing For Back and Front Wheels
For RC racing, it really depends on the track you’re racing on. In general, since back wheels are stationary, they should have negative camber with toe-ins to provide stability at high speeds. The front wheels should have negative camber with zero toes meaning the front wheels should be straight when viewed from the top. Some toe-out at the front may also work.
The video below vividly compares the effects of toe-out and toe-in to an RC car with onboard FPV camera.
Again, different races on different circuits should require different camber and toeing setups. Be willing to experiment. Some RC racers advocate setting one to two degrees of negative camber on all four wheels.
But toe-in or out for front wheels is a little more complicated. The general idea is the more the toe-in the more the understeer, while the more the toe-out the more the oversteer.
