Most times, space is not a luxury in an RC car. So, for those who are serious about finding an ideal place to place your FPV camera on your RC vehicle, here’s what you need to know.
Place Camera On The Rooftop
A common sense location to place a camera. It’s easy to install by using double tape or duct tape but if your FPV rig is rather bulky (like an action camera), the instability of the body shell will cause the camera to tilt and affect your vehicle’s handling characteristics.
The good news is the body shell acts like a suspension to absorb the vehicle’s shocks, thus making your video less shaky.
You also need to consider drilling holes for your camera’s power cable or feeding the line around the side of the body shell, if the cable is long enough.
Place Camera Below the Body Shell In Driver’s Seat
A realism fan’s best option since this point of view gives you the feeling of driving your RC car from the cockpit.
However, this is usually possible only if you have a tiny camera. If it is and if it comes with a built-in video transmitter then you need to drill a hole in the rooftop for the antenna to protrude. This guy in the video below did it without a rooftop.
Attaching your camera directly to the flexible body shell also gives you some cushion needed to absorb the vibration from your vehicle.
Do consider providing extra damping by adding a foam on the body post between the body shell and your RC body. This will help to reduce vibration which might create a jello effect, especially with digital-based camera.
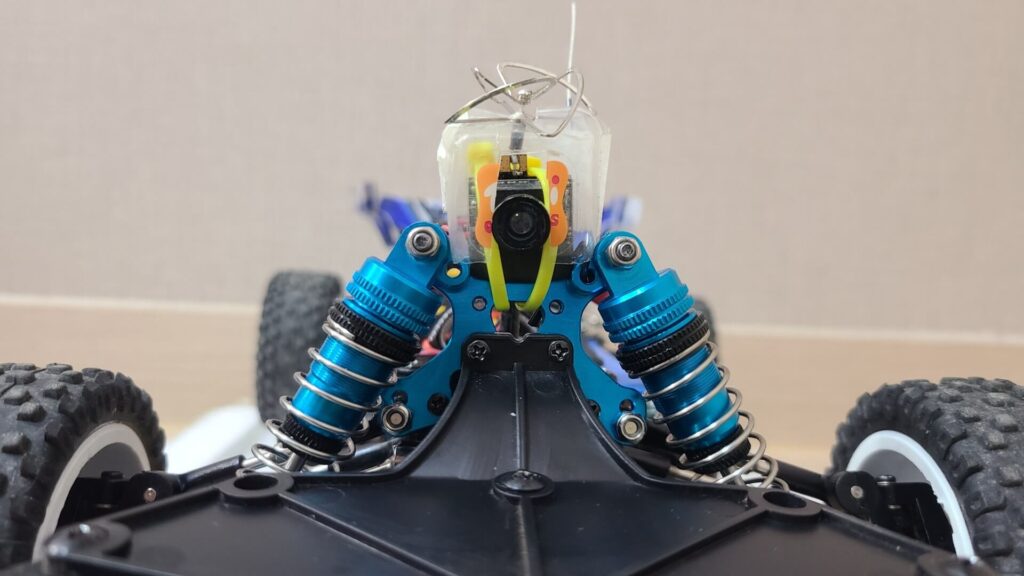
Place Camera on Shock Tower
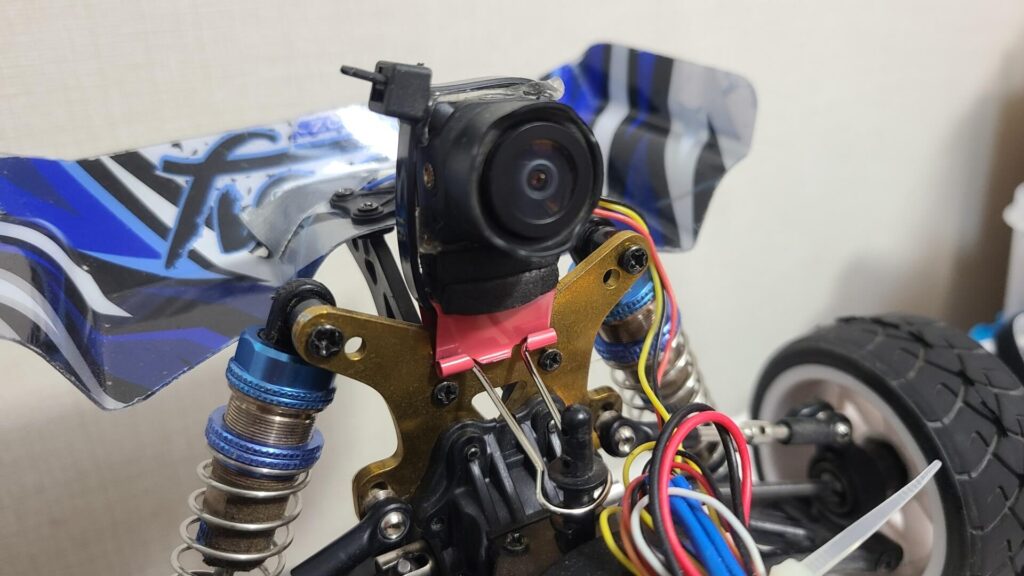
This is one of the most ideal locations to position your camera. Simply because shock towers are always at the center of your vehicle and they are rigid enough to prevent any swaying or tilting of your camera. A soft foam should be inserted below the camera to reduce shakiness and jello effect in the video.
Which begs a question – at which shock tower should you place it? Front or back? Read on.
Place Camera Near The Front of RC Car
This is akin to a rat’s point of view because you’d get a lower-level view that is nearer to the ground. You may wish to use this placement option if you’re driving a truck that has a higher profile compared to a buggy or a standard car.
RC drivers can also consider this option when they do not want their view to be obstructed by the vehicle’s body.
Place Camera Near The Back of RC Car
This is probably the best place to locate your FPV camera since it offers a higher cat’s eye view plus you get to see your RC in the video feed. This can be crucial since you get to see the condition of your vehicle. You might hit a rough patch or went too high on a jump that could dislocate some parts.
However, you may be concerned about the potential interference from the nearby motor. Electromagnetism noise is known to cause interference to the video signal such as creating distorted lines. An analog video system is prone to this issue.
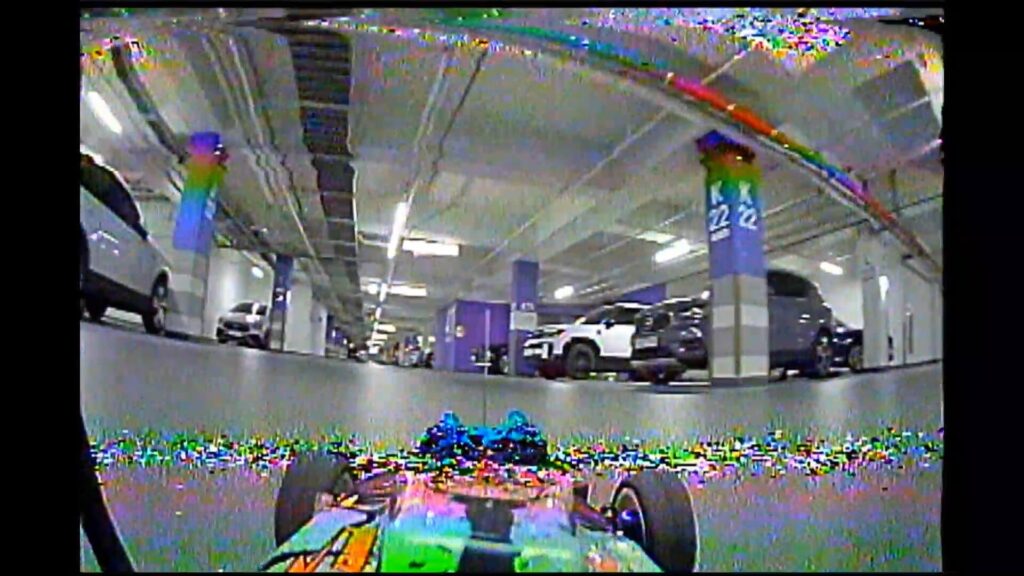
From our tests, we can’t see any difference in video quality when placing the FPV camera near the motor (at the back) or away from it (in front).
Place The FPV Camera Near The Battery Outlet
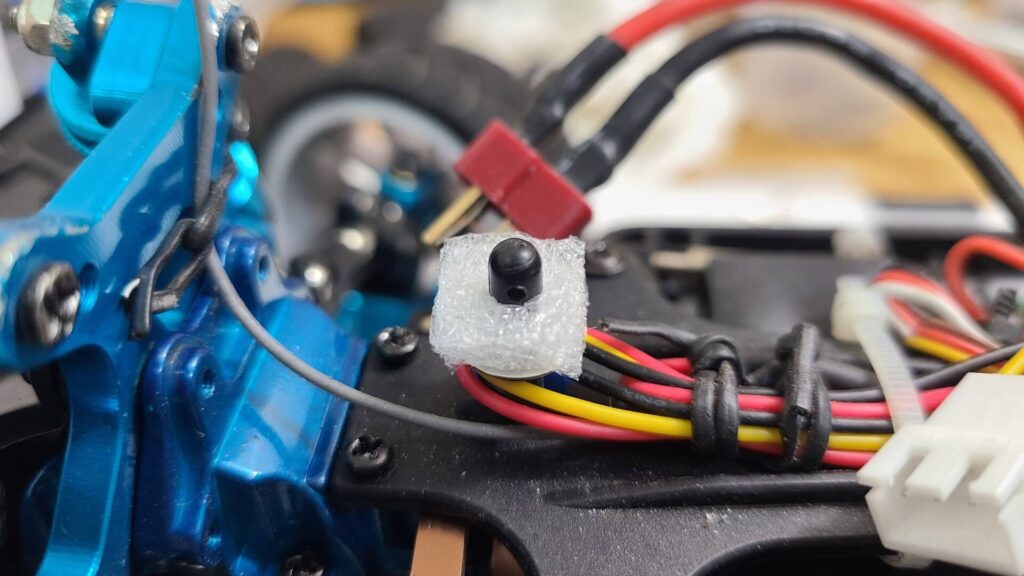
Some RC cars have their battery connectors pointing backward while some are forward. Regardless of where it is pointing, you may want to reduce cable length by placing the camera nearest to the power outlet if space permits. Otherwise, use a separate battery just to fire up your camera.
FPV Camera With Separate Video Transmitter
If your FPV camera comes in a single unit together with a transmitter, then you would be spoilt with choices since form factor should not be a factor to you. However, if you’re using a setup with a separate camera and video transmitter, you need to consider a strategic location for these units. You don’t want your antenna to be blocking your camera’s point of view and moreover, you need to ensure your transmitter and camera have the cable length to tap its power from your Lipo battery.
Some transmitters come with a voltage output such as the TS5823 unit that you can power your camera. This would ease your wiring effort but also require your camera to be close to your transmitter.
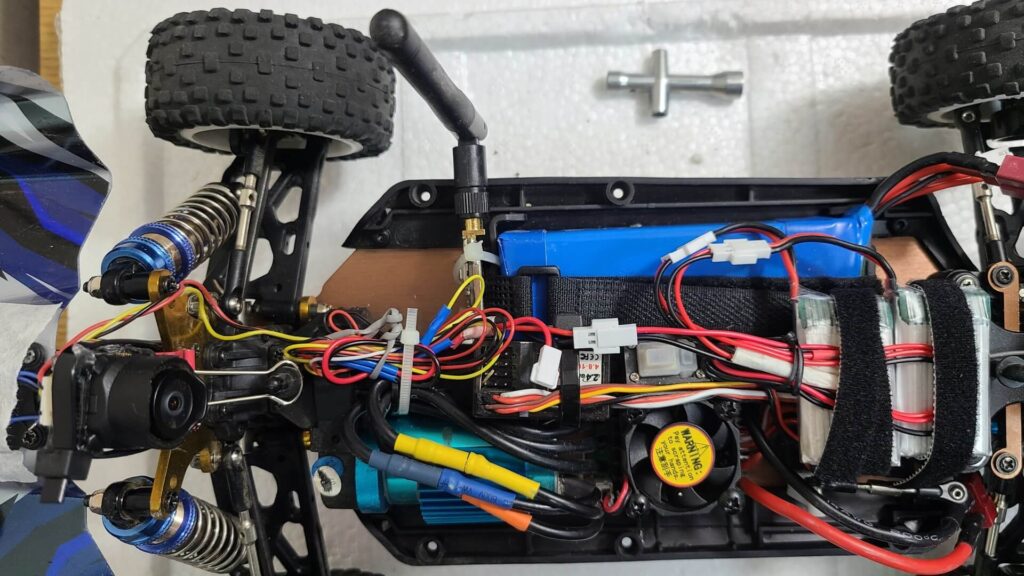
The image below depicts an installation of a RunCam Phoenix 2 camera with the TS5823 transmitter located behind the battery. Both units are close to one another while the antenna is placed at the side of the body.
3D Print a Bracket and Mount Your Camera Wherever You Want
Even though this option may be more complicated than others, it is the most elegant and fanciest choice. The beauty of this is the ability to customize a perfect bracket for the perfect spot for your camera.
Unlike drones, where camera placement is pretty standard with pre-made mounts, RC cars aren’t that lucky since radio-control ground vehicles come in all shapes and sizes. If you have the maker’s hands and head, do consider this option.
Provide Some Flexibility With Your Mount
RC car crashes do happen, just like RC planes, so it’s best to expect the unexpected. Try to mount your camera that allows some room to maneuver such as the ability to rotate or detach itself from the mount upon a hard impact. This is most critical when your car turns turtle.
In the photo above, you can see that we attached our camera to a shock tower using a paper clip. This clip has saved the camera from multiple crashes particularly when the entire car flipped upside down. The wires from the camera help to keep the unit tethered to the RC car.
You want to save your camera from irreparable damage and letting it “fall” with your car will lessen the force of impact and let you shoot for another day.
